


This is a continuation of my previous article "Using Ansible & Nomad for a homelab (part 1)" which you'd probably want to read first to follow up where I left off there.
Nomad
Nomad is a well-known workload orchestrator. I have decided to automate my homelab cluster using it. I will through this blog post try to walk you through some discoveries I made on the way during the previous couple of months.
Features that drove me to Nomad:
- Conciseness,
- Evolvable setup (constraints, static ports are there for simple setups for example),
- I already had knowledge of kubernetes and wanted to try something else
- I had experience with Terraform and Consul so I was sure Nomad is probably a good choice to at least try it out.
I wanted to share with you how I configured couple of different services, just so you can get a feeling of the freedom that Nomad gives.
For experienced DevOps people some of the choices will be painful because of the shortcuts taken - but that is exactly the point: what I will try to prove is that Nomad is a perfect match for an ad-hoc homelab and that it allows you to evolve it into the more and more serious setup as your knowledge of the principals of workload orchestration in Nomad grows.
I chose a path of explaining the principles by showing some code examples from my own homelab and following the path of the most trivial examples towards the more complicated ones, expanding the coverage of possibilities as we go. So, I tried to make a story out of it instead of just showing you the end result :) But, if you want to visualize the end result - here it is, as of 16/03/2022 the topology of the deployed homelab:
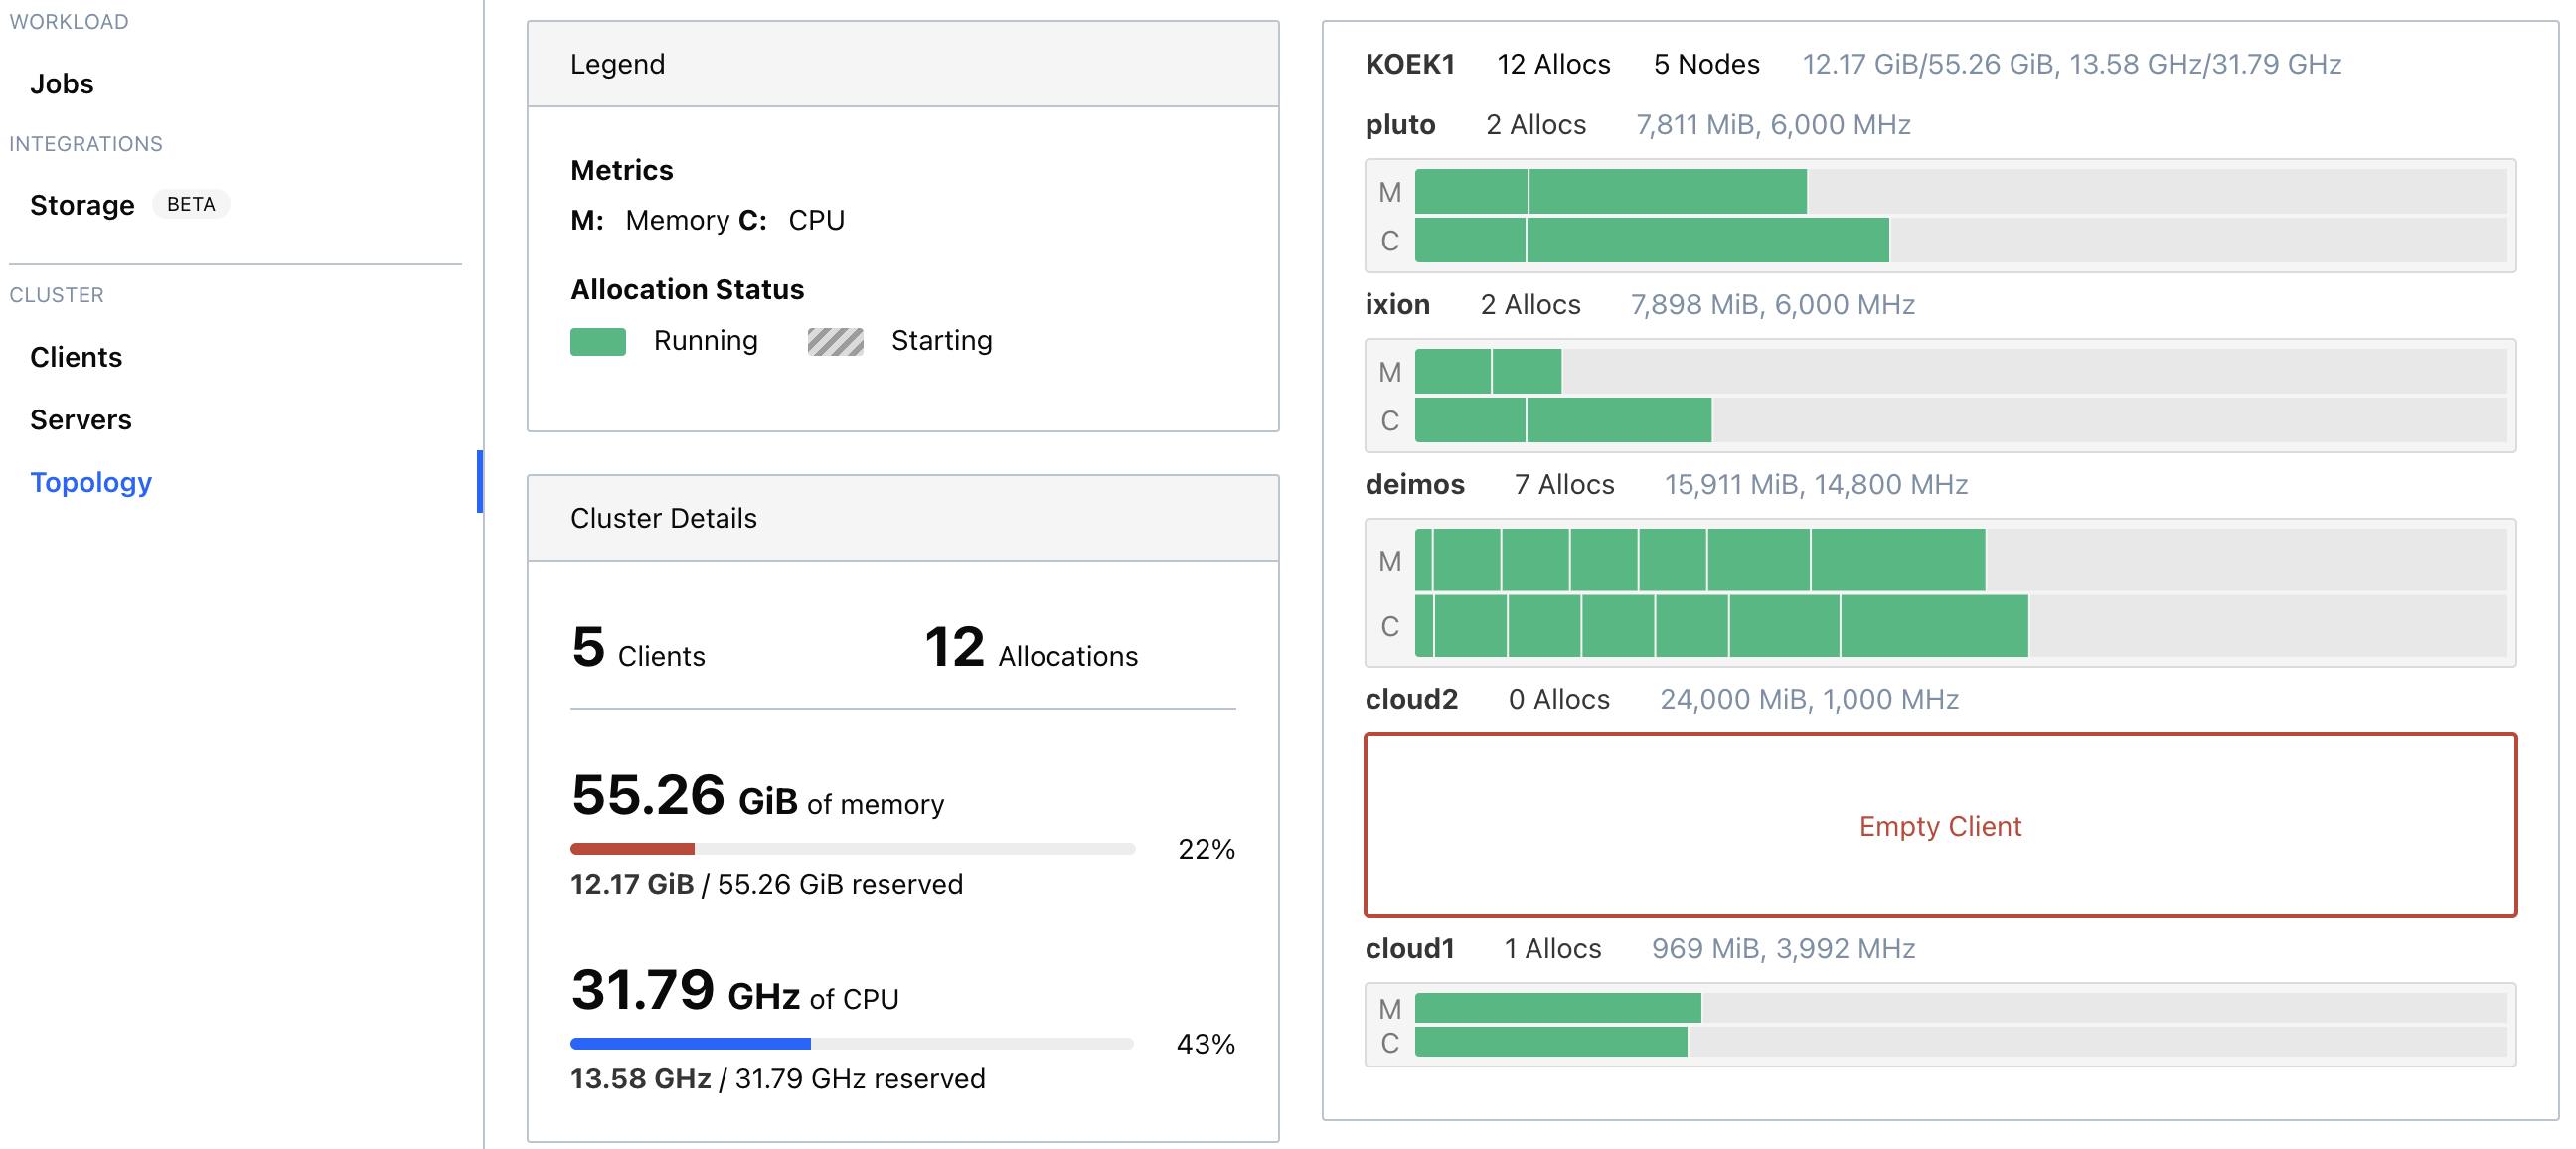 .
.
So, without any further ado let's start...
Example: a cron bash script
It can't be any simpler than this: you have some bash script that you want to be executed from time to time. In my case, I have some background processes I need to kill (workaround, until I fix the go app that creates those zombie processes, ... somewhere in this decade I guess).
Nomad has a concept of a sysbatch that is basically a glorified cron executor. In combination with a raw_exec driver which is meant to run the lowest possible native OS code (no chroot, fast startup, surely some kind of protection but still the least recommended approach from all the drivers).
When moving things from conf management tools (like Chef/Ansible) into Nomad that's probably a very nice thing to have. Later on, you'd probably want to lower the number of jobs defined in this way and go more into a fully managed approach (which we will shortly touch), though. Still, the freedom of just defining it like this and then, later on, evolving it into the proper approach is the reason why I chose Nomad over k8s.
job "batler_cleanup_periodic" {
  datacenters = ["KOEK1"]
  type        = "sysbatch"

  periodic {
    cron             = "25 21 * * * *"
    prohibit_overlap = true
    time_zone        = "UTC"
  }

  constraint {
    attribute = "${attr.unique.hostname}"
    value     = "pluto"
  }

  group "main" {
    task "script" {
      driver = "raw_exec"

      config {
        command  = "/usr/bin/bash"
        args     = ["-c", "pkill -u batler_remoteexec || true"]
      }

      resources {
        cpu    = 500
        memory = 128
      }
    }
  }
}
You might have also noticed the "constraint" stanza, where I fix the location of the script into the place I have it currently defined in Chef. This way I was able to evolve node by node from the old solution into the new one. Therefore the migration process was:
- move all the stuff that can't be put into Nomad into Ansible (including the Nomad itself);
- for all other things that can be moved to Nomad, move them into the simplest possible abstraction in Nomad (lowest possible hanging fruit being
raw_exectask type); - remove chef-client, Ruby, git repo for chef-zero execution etc etc;
- move to another node, repeat 1-3;
- look how to improve migrated jobs into "better" / more professional implementations, learning as you go.
Example: excalidraw
Excalidraw is a very nice drawing tool I like using from time to time. It's open source and even has a free online version of it. I thought it was awesome and just decided on deploying it myself in the homelab! It's just a simple completely stateless service with a docker container, it can't be easier than that.
Here it is:
job "excalidraw" {

  # ... superfluous things, already presented previously, commented out

  group "main" {
    network {
      port "http" {
        static       = 2734
        to           = 80
        host_network = "tailscale"
      }
    }

    task "excalidraw" {
      driver = "docker"

      config {
        # SHA of what was latest on 04/11/2022
        image   = "excalidraw/excalidraw:sha-4bfc5bb"
        ports = [
          "http"
        ]
      }

      service {
        name = "excalidraw"
        port = "http"

        check {
          type     = "tcp"
          port     = "http"
          interval = "10s"
          timeout  = "2s"
        }
      }
    }
  }
}
What you can see here is the following step: how to deploy an online service in Nomad. Since it was deployed as a docker-compose service managed by systemD previously, it was only natural to use the docker driver and put it on the same machine.
You will notice that the stanza network hardcodes the port occupied by the service on the tailscale network, defined inside the Nomad configuration on that node as:
client {
  host_network "tailscale" {
    cidr = "100.65.51.119/32"
    reserved_ports = "22"
  }
  // other non-relevant configuration options
}
This makes sure that the port will be exposed only on the Tailscale network. Obviously, the Tailscale agent is installed and fully operational at this point, but I used Ansible to set up that part before I even tried running any Nomad job on the machine.
The service is registered on Consul via the service stanza and is nicely exposed in the consul listing
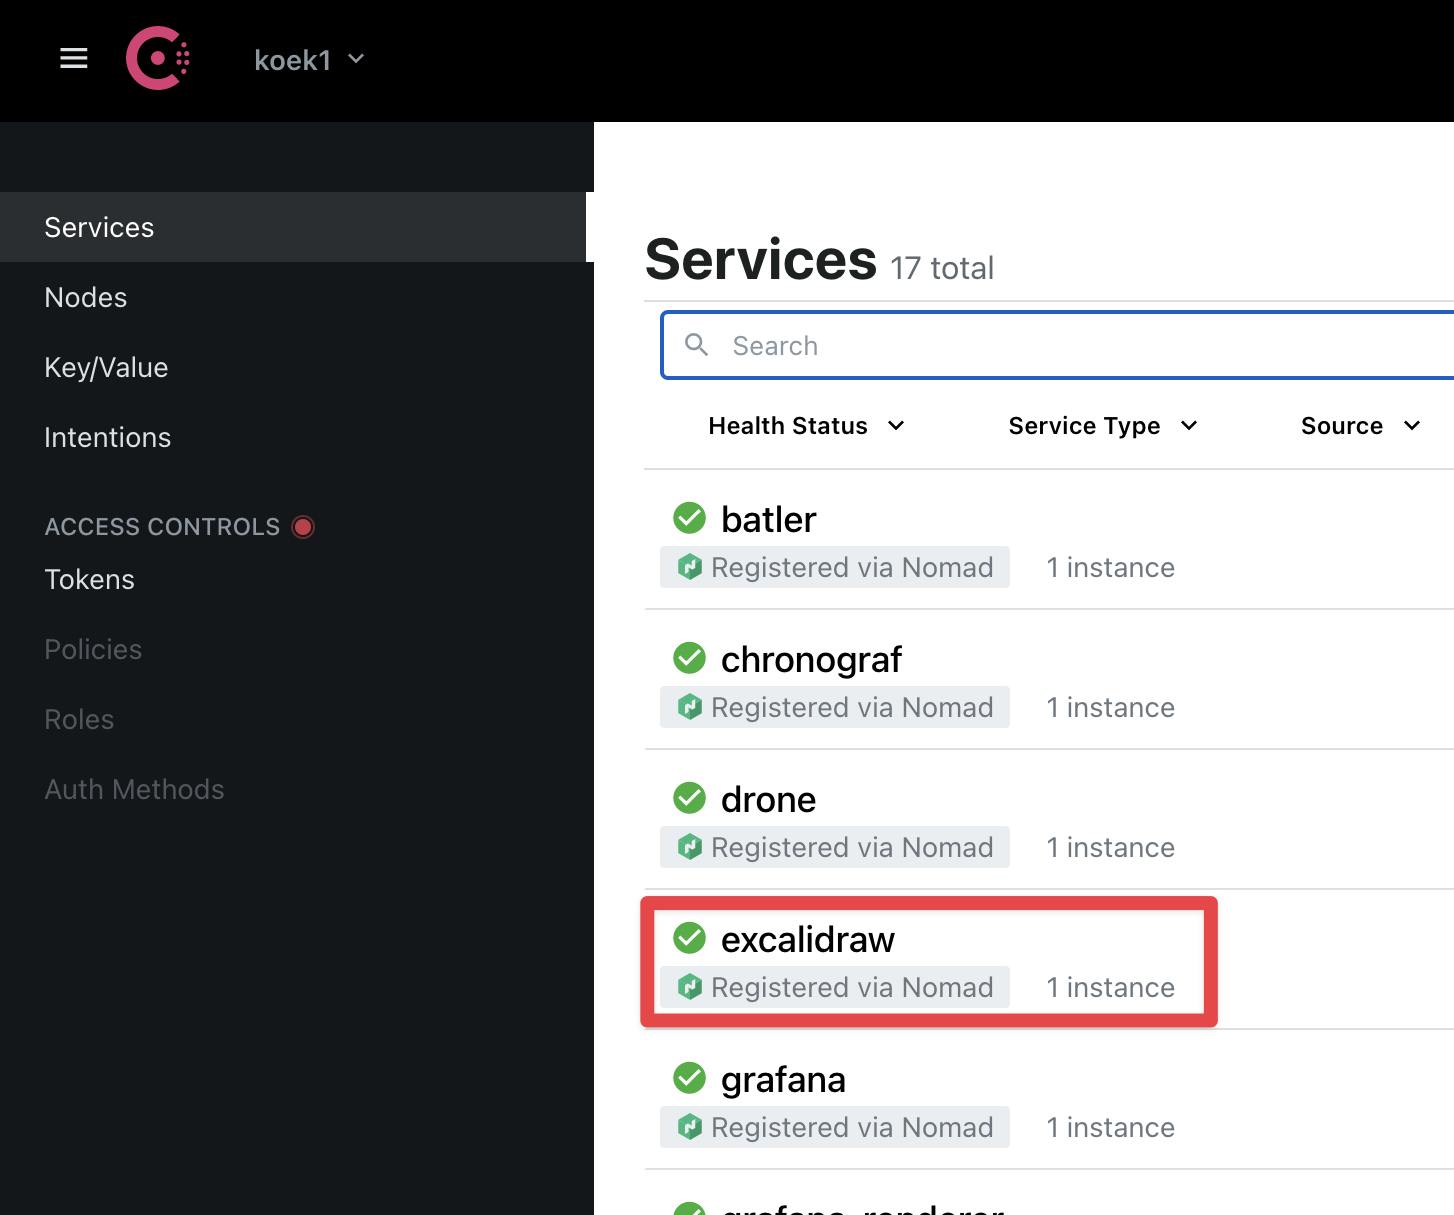
Consul and Nomad work together to make sure that the service is always online via Consul checks and if anything goes bad (like OOM in docker because of over-provisioning which may or may have not happened) the services will just be restarted as nothing happened. This example just does a raw TCP connection test, but you should try to go an extra mile to add a full HTTP verification path that the application exposes (if possible, only locally) and which, behind the curtains, makes sure the application is running in a stable fashion.
Example: Resilio
Next example represents my Resilio File Sync job installation. Now, this one has its share of new concepts I had to understand and apply:
job "resilio" {

  # ... superfluous things, already presented previously, commented out

  group "main" {
    ephemeral_disk {
      migrate = true
      size    = 150
      sticky  = true
    }

    volume "btsync" {
      type      = "host"
      read_only = false
      source    = "btsync"
    }

    task "download" {
      driver = "raw_exec"

      lifecycle {
        hook = "prestart"
        sidecar = false
      }

      artifact {
        source = "https://download-cdn.resilio.com/[[ consulKey "resilio/version" ]]/Debian/resilio-sync_[[ consulKey "resilio/version" ]]-1_arm64.deb"
      }

      config {
        command  = "/usr/bin/bash"
        args     = ["-c", "7z x -y local/resilio-sync_[[ consulKey "resilio/version" ]]-1_arm64.deb && tar xvf data.tar ./usr/bin/rslsync && rm data.tar && mv usr/bin/rslsync ../alloc/data/"]
      }
    }

    task "main" {
      driver = "raw_exec"

      config {
        command  = "../alloc/data/rslsync"
        args     = ["--nodaemon", "--config", "local/config.json"]
      }

      template {
        data = <<EOF
[[ fileContents "config.json.tpl" ]]
        EOF
        destination = "local/config.json"
      }
    }
  }
}
Job uses ephemeral_disk stanza to try (best-effort, so don't count on it 100% of the time) to maintain filesystem state across job re-deployments. I have learned indeed not to depend on it, but to use my NFS share from my NAS for anything
Little digression, albeit an important one, now: I hope you have a NAS? I mean, what kind of homelab cluster do you think you have if you haven't bought (or, in case you are an adventurous type, self-built a RaspberryPi-based system, soldered to your wall, or whatever else rocks your boat) a network-attached storage device, aka NAS? I bought my ancient Synology DS413j many years ago and am just from time to time extending/buying new disks. Of course, it's ancient, which means I have a chroot Debian Wheezy (that's version 7) folks, 2016 got the last update), but it does its job still well enough that it doesn't deserve any kind of upgrade. Probably my best buy ever because it enables so many uses cases of the homelab...
Further, you can see how I leverage here volume stanza to mount a host directory (backed by Ansible-driven NFS share) defined like this inside the Nomad config file:
client {
  host_volume "btsync" {
    path      = "/mnt/btsync"
    read_only = false
  }
}
This basically allows the Nomad job to access files stored remotely on a shared NAS drive.
Off-topic, but perhaps relevant to complete the picture, if you'd like to know how this mount is set up in my Ansible part of the setup, it's basically a dumb-down variant of an open-source ansible role from the OpenStack project.
Now, since this job doesn't use Docker (yet), I chose to utilize an init container sidecar pattern in the form of "Nomad prestart task" that just fetches a binary for this system architecture from the official web site and store it in alloc/data (backed by ephemeral disk). Then, the real service starts the service and keeps it online.
Astute reader might ask why I am not doing a check if the identical file wasn't already downloaded, but I think I will just move to Docker later anyway.
Finally, you might have noticed weird constructs in the job file: [[ consulKey ... ]]. What are those now? Well, I am using levant tool which is a layer around the nomad CLI. I have found this tool very useful since it, at least:
- allows for CI/CD setup (you externalize parts you want to be pushed from CI/CD, like image version for a docker image),
- allows templating parts of job definition that would otherwise have to be hardcoded or embedded, (like file contents - in case of files that span hundreds of lines you really want them out of the job file).
Config file for Resilio sync
Just to complete the picture here, here is the attached config.json.tpl file to see how I have configured one of my Resilio sync target directories:
{
    "device_name": "{{ env "attr.unique.hostname" }}",
    "use_gui": false,
    "log_size": 30,
    "listening_port": {{ env "NOMAD_PORT_http" }},
    "shared_folders": [
      {
        "dir": "{{ key "resilio/syncs/haumea/dir" }}",
        "overwrite_changes": false,
        "search_lan": true,
        "secret": "{{ key "resilio/syncs/haumea/secret" }}",
        "use_dht": false,
        "use_relay_server": true,
        "use_sync_trash": true,
        "use_tracker": true
      }
    ],
    "storage_path": "../alloc/data"
}
I could've chosen the path of just embedding the template in the Nomad job, but my preference is to always lower the noise in the Nomad job if I can help it, and, therefore,
levantprovides a nicefileContentstemplate function.
In that file there will be no special surprises, but you can see how you I combined both:
- environmental settings (dynamically changed by Nomad when (re)deploying) using
envtemplate variables; and - consul-driven keys, like the location and secret needed for the Resilio to handshake through its system with all the other clients about the state of my files - my phone, laptop etc.
By the way, using Consul keys lets me easily issue a redeployment of this Nomad job just by changing the key in consul KV store. Although, in this case, it makes no sense since both directory and secrets are there for the reasons of "externalization from the template", not because of security purposes.
Example: ThoughtTrain
So far, the nomad job files were based on well-known off-the-shelf software packages. ThoughTrain is my own OSS Go app hosted on Github which is totally unknown to broader audience but in short it's my own variant of "Read it Later".
Deployment is done using levant from within the code repository of that project. This is, thus, different from the previously mentioned jobs since they are part of the homelab repo. But, if you are maintaining the source code of a project it simply makes sense to keep the infra part inside that same repository.
This time I will not share code of a nomad job since it's open source & inside that project, I just wanted to share the mechanics of deployment, built on previous concepts.
The CI platform is Github Actions workflow, build is driven by make so it might not be the easiest to follow, but effectively it all boils down to a simple concept: when I push a tag to GH this command is executed.
export VERSION=<TAG> && ./levant deploy \
    -log-level=WARN \
    -consul-address=<consul location>
    .github/workflows/thoughttrain.nomad
I use the log level WARN so the secrets read from Consul are not put in the output.
I put the "consul location" as a secret into my Consul server.
Of course, this can only work if GH Actions connects temporarily to my homelab network as a temporary node using ephemeral tailscale nodes in combination with the Tailscale GH Actions action.
Example: internal-proxy
Finally, the crown jewel for a homelab is a single centralized place where all your services get exposed using domain names. I have chosen Caddy since it's so easy to setup and has very rich ecosystem of support of various flows:
- I prefer using Let's Encrypt (even for the internal homelab services) and Caddy just supports it out of the box!
- Cloudflare is also supported, albeit with a need to build custom ARM docker image (details shortly)
- all my markdown notes are just exposed as a readable web site.
I am actually so happy with what Caddy does for me after 7-8 years of using nginx that I even plan on writing a mini-blog post in the future to go through my favorite features of Caddy
Here is my Caddyfile template I use in the inverse-proxy nomad job, shortened a bit to remove redundancy and non-critical parts:
*.milanaleksic.net {
  encode gzip
  tls milanaleksic@gmail.com {
    dns cloudflare {{ key "cloudFlare/cfApiMilanaleksicNet" }}
  }

  @chronograf host chronograf.milanaleksic.net
  reverse_proxy @chronograf {{range service "chronograf"}} {{.Address}}:{{.Port}} {{end}}
}
Why do I need Cloudflare integration? Well, Let's Encrypt uses DNS verification process to verify I am a domain owner, therefore there is a need for a short handshake between Let's Encrypt servers and my own DNS records, and Caddy does it all by itself. Just this fact removed a need for a cron job, python script and more complex setup to handle certificate renewal process in nginx I had to do while in Chef.
Additionally, please observe how I refer to the location of Chronograf service: I do not reserve the port statically in chronograf.nomad:
job "chronograf" {
  // ...
  group "main" {
      port "http" {
        to           = 8888
        host_network = "tailscale"
      }
    // ...
    task "chronograf" {
      // ...
      service {
        name = "chronograf"
        port = "http"

        check {
          type     = "tcp"
          port     = "http"
          interval = "10s"
          timeout  = "2s"
        }
      }
    }
  }
}
and I just let Consul and Nomad negotiate which port should be taken. Each time chronograf gets (re)deployed this port is chosen a new and reverse-proxy gets restarted. Easy-peasy, nothing for me to do there, just like in k8s.
Here is the job specification for inverse-proxy:
job "internal-proxy" {

    task "caddy" {
      driver = "docker"

      config {
        image   = "milanaleksic/caddy-cloudflare:2.4.6"
        volumes = [
          "../alloc/data/caddy-config:/config",
          "../alloc/data/caddy-data:/data",
          "local/Caddyfile:/etc/caddy/Caddyfile"
        ]
        ports   = ["http", "https"]
      }

      env {
        ACME_AGREE = "true"
      }

      template {
        data = <<EOF
[[ fileContents "Caddyfile.tpl" ]]
        EOF
        destination = "local/Caddyfile"
      }

      service {
        name = "internal-proxy-http"
        port = "http"

        check {
          type         = "tcp"
          port         = "80"
          interval     = "10s"
          timeout      = "2s"
          address_mode = "driver"
        }
      }

      service {
        name = "internal-proxy-https"
        port = "https"

        check {
          type         = "tcp"
          port         = "443"
          interval     = "10s"
          timeout      = "2s"
          address_mode = "driver"
        }
      }
    }
  }
}
Now, this job spec is interesting because of couple of reasons.
Building ARM Docker images
This is a custom (public) Docker image built for aarch64 architecture on my Mac Book Pro.
by the way, you get to use
aarch64architecture not only on modern cloud ARM servers, but also if you install 64bit ARM OS on a Raspberry Pi 4, for example.
To build and push this I have utilized the Docker Desktop for Mac "buildx" feature. My build script for this image is basically this:
#!/usr/bin/env bash

# latest on 10/02/2022
export CADDY_VERSION=2.4.6
# This depends on Docker for Desktop (Mac), because that one supports multi-arch output
# Create that builder with "docker buildx create --name multiarch"
# Alternative: use DOCKER_HOST to point to a remote arm / x64 node
docker buildx use multiarch
docker buildx build \
  --platform linux/amd64,linux/arm64 \
  --build-arg CADDY_VERSION=${CADDY_VERSION} \
  -t milanaleksic/caddy-cloudflare:${CADDY_VERSION} \
  --push .
and my Dockerfile is:
ARG CADDY_VERSION=0.0.0

FROM caddy:builder AS builder

RUN caddy-builder \
    github.com/caddy-dns/cloudflare

FROM caddy:${CADDY_VERSION}

COPY --from=builder /usr/bin/caddy /usr/bin/caddy
I was previously very spectical about using Docker containers on a Raspberry Pi. But, these new 4s don't mind. Things just work, even backed by cheap SD card. Very nice. I plan on changing all my binary and script jobs with ARM / x64 Docker images in the future.
But, as I have said many times above - the nice thing with Nomad is that it allows you to start with low-hanging fruits and build slowely more professional setup.
Conclusion
We have reached the ending of what I thought was reasonable enough to follow. I have actually cut quite a few points on the road, but hopefully this blog post was enough to get you interested. I got brand new interest in my homelab after doing this migration. I don't dred any more logging in into the nodes just to discover my Chef scripts got again broken after OS upgrade.
All in all, I think this migration was a very good exercise in complexity with a lot of things I have learned on the way. Would definitely recommend for devops enthusiasts as an alternative to fully-managed k8s cluster.
Actually, even fully acknowledging the likes of k3s allowing a single binary/SQlite setup, I still prefer Nomad path just because of simplicity and clarity of the job specification format instead of YAMLs. But that's just a personal preference, there is nothing stopping you in doing this entire exercise using SaltStack+k8s if you prefer it. But, just don't forget about there being perhaps a simpler approach that has all the benefits.
Bad sides of Nomad
There are plenty. Nothing comes without bad sides, there is no perfection.
I, for once, really disliked the fact that I can't expose job's task port statically on IP 0.0.0.0 (this exposes the port on all IPs). It's impossible, try it (if you find a way, please reach out!). It is a must for cloud deployments when you can't know the public IP of your node. Nomad just defaults to a first network interface it encounters (or specific ones if you set it up like that). There are some issues and discussions but no definitive answer yet. You just have to use consul gateway ingress, which I didn't have a time to explore (yet). Currently, I just start another out-of-Nomad Caddy reverse proxy using Ansible that then pokes into services deployed inside Nomad (sad 🐼).
Personally, I would prefer also that levant gets merged into nomad binary. It just seems that there is no need to externalize that functionality, just like kustomize got merged into kubectl as a subcommand kubectl kustomize. I know HashiCorp guys know what they're doing and am aware of a concept of splitting of concerns, but as an end-user I'd just prefer that I don't need 2 binaries.
Further work ideas
Where will I go further from these examples? Well, I see at least these avenues of improvement:
- utilize Vault instead of Consul for secrets
- this is more for learning purposes than it is for security reasons since we are still talking just about a homelab
- expose metrics from nomad jobs into grafana
- still not sure what's the best way here, I did notice at least one attempt using Prometheus either directly or via Telegraf intermediary in front of InfluxDB which I already have in the cluster...
- expose Nomad jobs' logs into loki
- currently I only push ansible apps and system logs into Loki
- try out all the interesting services now when workload management is in place: Redis, PlantUML, Grist, PiHole, private Docker repository...
- this is now way less work than before since, while building all the above examples and some more I haven't mentioned, I gathered enough know-how to add more quickly new things
- try out Consul Connect service mesh